Preparation to replacement
Let's start by saying that a minimum of manual skill is required, not much, but if you have never held a screwdriver in your hand, maybe contact the assistance center. At any time, if you are afraid of breaking something and/or are unable to move forward, stop and contact Tesla, because you could cause damage when replacing the cabin filters.
Once the ritual recommendations are finished, let's begin to see what we will need to proceed. First of all we buy the filters, here is the link to the official shop, shipping is free and usually arrives in 48h. Warning, filters from buy are 2 for a total amount of €30 (if you missed the news of the opening of the shop here it is).
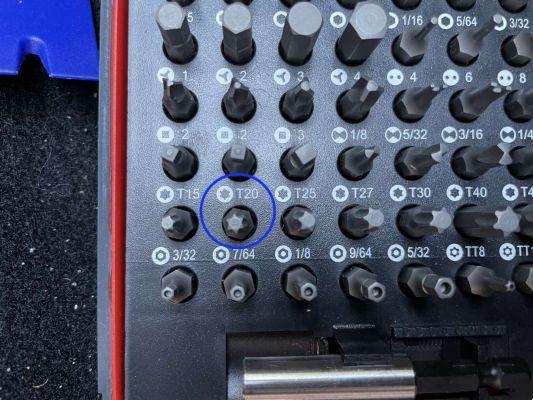
Last tool to get hold of is a screwdriver with tip T20, the workspace will not be large so it is better to opt for a short screwdriver if you have any.
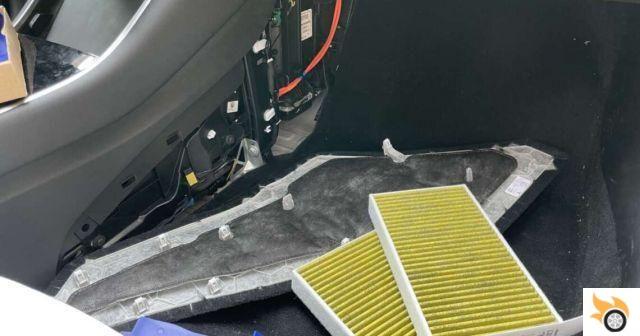
Access to the filters is located in the side belly of the central tunnel, via the passenger footwell. We remove the mat, let's turn off the air if turned on and we move everything back the passenger seat.
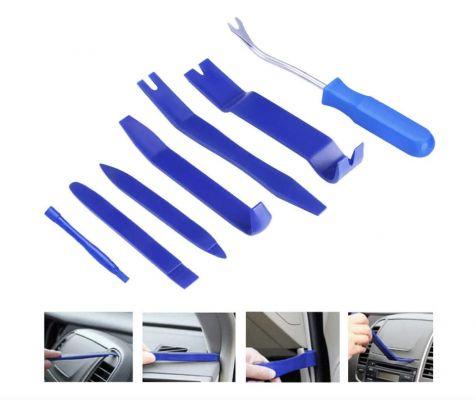
We insert the lever between the panel of fabric and the plastic to detach the interlock pressure, it may take a little time force. Here in the photos you can find where they are positioned. Once removed, we remove the panel simply by pulling it from the lower part.
Now we will have to disassemble the panel that contains the foot light and the audio box, under the glove compartment. I am 4 “stop” from having to pull away, using the leads with the "V" tip we lift the head of the central pin and then pull it to remove the entire retainer. The panel it is removed by lowering the front part and pulling towards us to remove it from the rear guides.
We remove i connectors of the light and the case. For the light we will first have to pull down the tab and then remove the connector, for the case it will be enough Pull perpendicular to it.
Replacement of filters
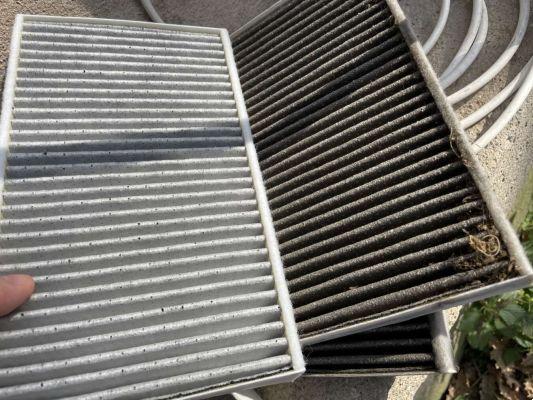
The filters are two as we have already said, one above the other. From the tab we can easily remove the first under which we will then find the other. Arm yourself with vacuum cleaner because some dirt will probably fall.
Once the old ones have been removed, we insert the new ones keeping the part yellow towards us. Since we will need it for when we have to replace them again, remember to fold the tabs in a comfortable way; that of the lower filter we will fold it over it while that of the upper filter we will leave it closed along the side.
To close the filter cover, insert the lower part first and then screw the upper screw back on.
Now it will be enough to retrace the steps in reverse to reassemble everything.
Did you find it simple? Remember that for any passage that you may not have clearly understood, you can write to us on the channel Telegram and we will reply you as soon as possible.